My good friends Brett & Rachel recently got married, which was a great excuse for indulging in many a glass of Pimms, a literal stack of cheeses, and best of all, ALL OF THE CRAFTS!
Between wedding cupcakes, a guest book and the most involved handmade present I think I’ll ever make, I spent a lot of time before this wedding doing three of my favourite things: quilting, bookbinding and baking.
The Giantest Quilt That Was Ever Quilted!
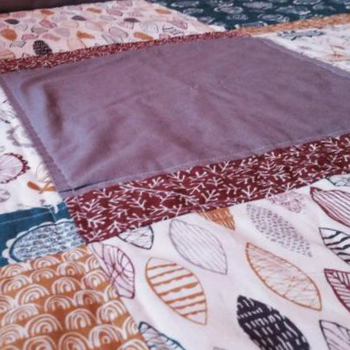
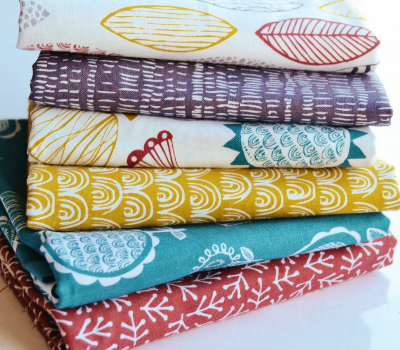
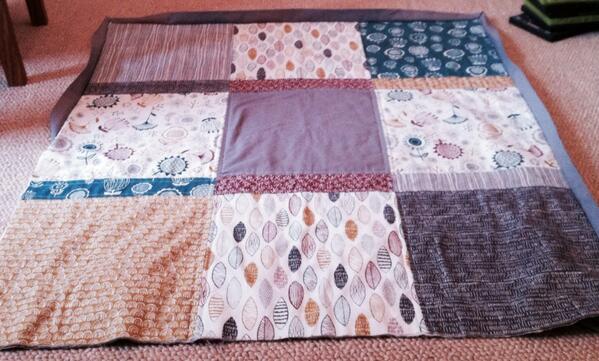
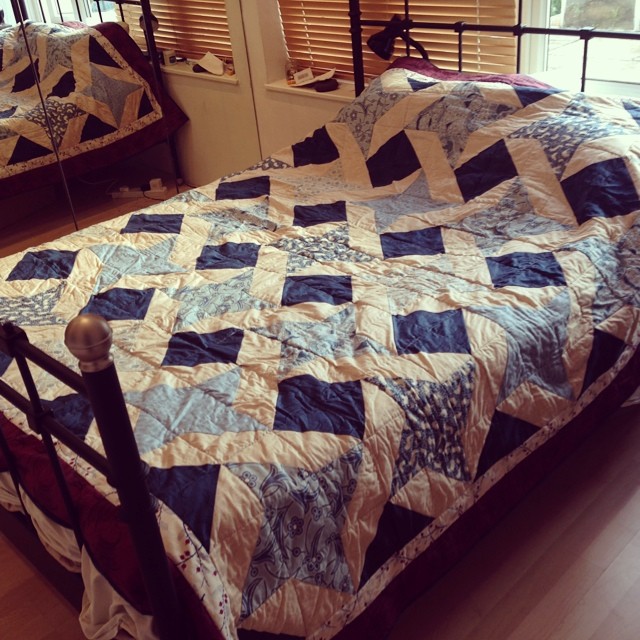
A few months back, I took a quilting class with @Jenepel. We both thoroughly enjoyed it and were already planning many a lap quilt when we found the gorgeous Downton Abbey fabric collection. We kept thinking how much the bride would love those fabrics and what a good wedding present a quilt would be, so we decided that one day-long class had probably taught us enough to attempt a full size quilt. On a deadline. A very short deadline.
 We decided on making a quilt quickly, but discussed which pattern, which fabrics, how to arrange them together… for ages before we actually ordered any of the fabric and started working. Hence the tight, tight deadline. We’ll know better for the next quilt!
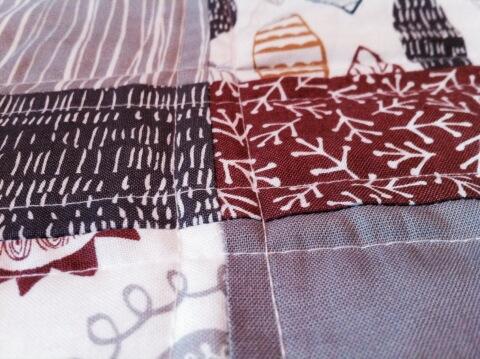
We chose a traditional pin wheels design and lots of blues, and then we cut, pressed, pinned and sewed frantically for evening after evening.
We watched lots and lots of episodes of Daria, and did our best to keep the cats from sniffing too close to the sewing machine. The scale surprised me, though I guess it shouldn’t have. In retrospect, the self-imposed tiny deadline made it a tad stressful, but all in all it was good fun. Now that it’s done and we’ve given it to the happy couple, it definitely feels worth it. Even that scary bit where the needle broke mid sewing and landed in my fingernail…
OMG, I Made a BOOK for someone’s WEDDING!
Shortly before the wedding, the bride and groom asked me to make their guest book, which I was thrilled about. I’ve made some books before, but I still watched a lot of YouTube videos to refresh my memory on coptic stitch binding. I found the channel Sea Lemon particularly helpful! Her tutorials are so clear and detailed, I’d definitely recommend them for beginner or advanced book binders.
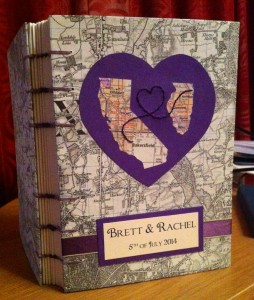 The book itself is A5 and portrait, which made it really easy to find material for the pages and covers. As per Sea Lemon host Jennifer’s advice, I bought an A4 drawing pad and used the paper for the pages and the cardboard back for the covers. The book is made of recycled paper and has twelve four-page signatures, so there’s plenty of space for messages.
For the cover, I was very lucky to find a vintage map of London in the first shop I looked. Because it’s in black and white, it works really well as a background and doesn’t clash with the other elements.
The colour scheme was purple, so I used purple card stock, ribbon and waxed bookbinding thread. I special ordered the thread instead of making my own because I wanted to be sure the book would last. You can’t see it very well here, but I’ve bound it in two different colours, which was totally a design decision and not an oh-darn-I’ve-run-out-of-thread decision.
OM NOM NOM CUPCAKES!
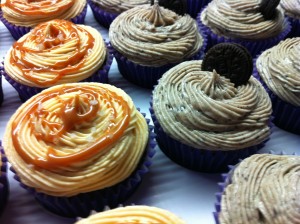 Instead of a wedding cake, there were many different flavours of cupcakes, all handmade by wedding guests.
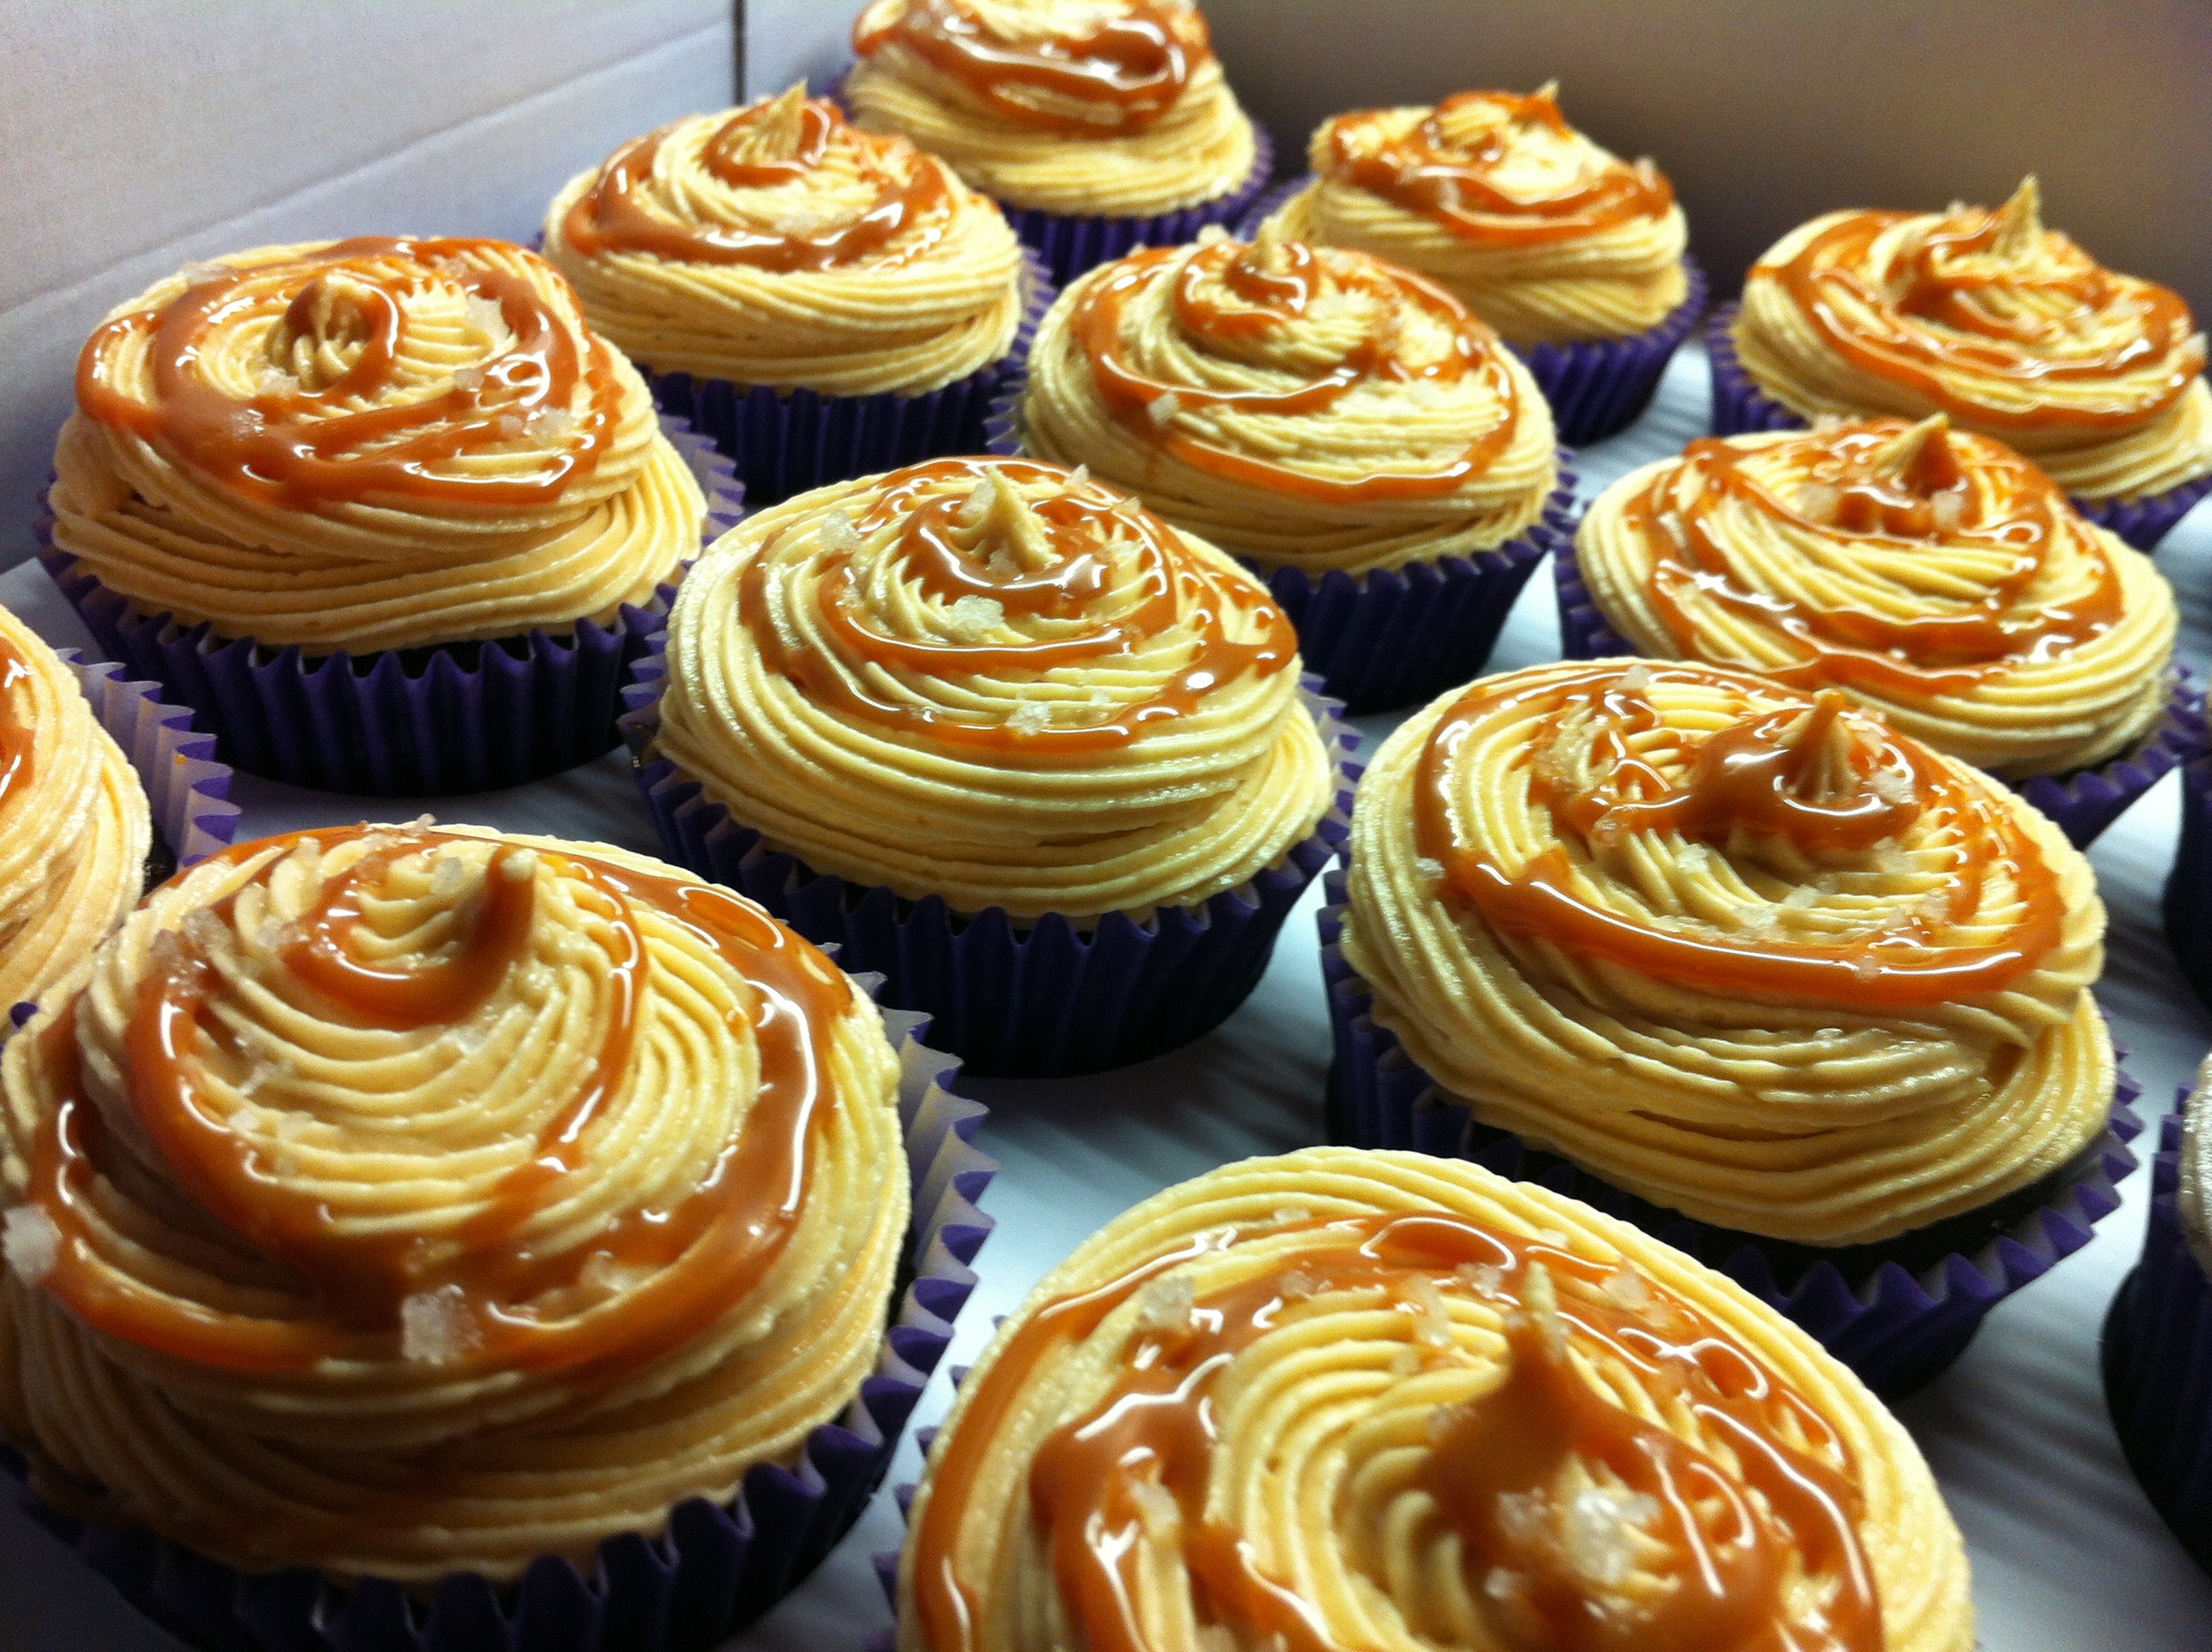
I brought in two different batches, Cookies & Cream/Oreo cupcakes and Salted Caramel cupcakes. They were gone fast and I kept getting compliments for them all night long, which made me all giddy (definitely the compliments and not the Pimms!).
The Oreo cupcakes followed this Cookies & Cream Cupcakes recipe from Bakerella to the letter, as I’d had pretty good comments about it every time I made them. It’s a fairly straightforward recipe which makes a lovely and moist chocolate sponge. The trick is that the batter has some milk and hot water added in, which keeps it from drying out. I also used this sponge for the Salted Caramel cupcakes; one batch and a half yielded just about 24 cupcakes.
The Salted Caramel cupcakes went down particularly well, with several people asking me for a recipe, so I thought I’d share it here:
[box]
Salted Caramel Cupcakes Recipe

Ingredients:
- A batch of Bakerella’s chocolate cupcake (see link below)
- A 397 gr tin of Carnation Caramel. You can also make Dulce de Leche by boiling a similar sized can of condensed milk, but buying the caramel will save you four hours.
- 150 gr butter
- 500 gr icing sugar
- fine table salt
- good quality sea salt, preferably Fleur de Sel
For the cupcakes:
Bake a batch of Bakerella’s chocolate cupcakes from this post, it should yield 12 cupcakes comfortably, likely more.
When the cupcakes have cooled a bit, use a teaspoon to make a small hole in the top of each, then spoon in a good dollop of your caramel and sprinkle on a small pinch of your good salt. This will take the cupcakes from nice-and-moist level into OMG-caramel-gooey-deliciousness territory.
For the buttercream:
Mix the butter, about 50 gr of caramel, and two or three good pinches of fine table salt with an electric mixer. Once it’s reached a creamy consistency, start adding the icing sugar little by little. Taste to check that you’re happy with the saltiness, and adjust if needed.
Spread or pipe the buttercream onto the cupcakes, and finish them up with a drizzle of caramel and a pinch of the good sea salt. Voila!![/box]
Let me know what you think if you try the recipe!!
 One of these conversations eventually brought up the idea that we should have a baking day to swap techniques. After weeks of scheduling conflict after scheduling conflict it finally happened!
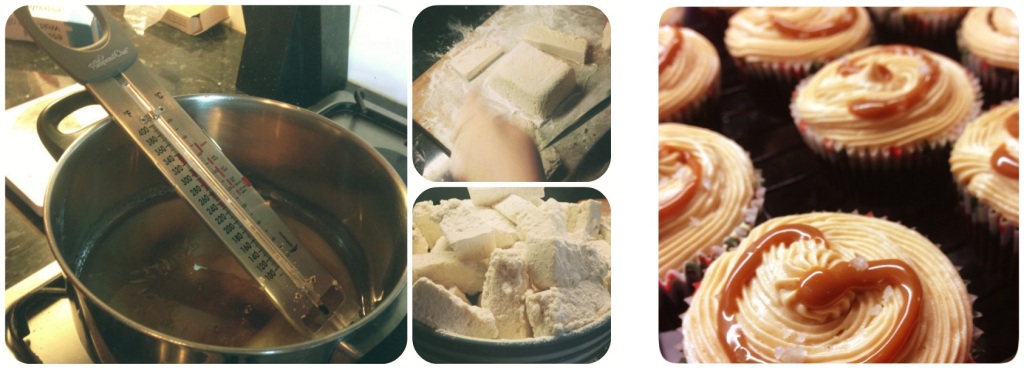 After that we made my salted caramel cupcakes (recipe here) and realised that trying to do three recipes in one afternoon was a bit much. We finished off the evening with some actual food, Doctor Who and board games! I didn’t enjoy The Caretaker much, but playing 7 Wonders and Smallworld for the first time in forever made up for it!